
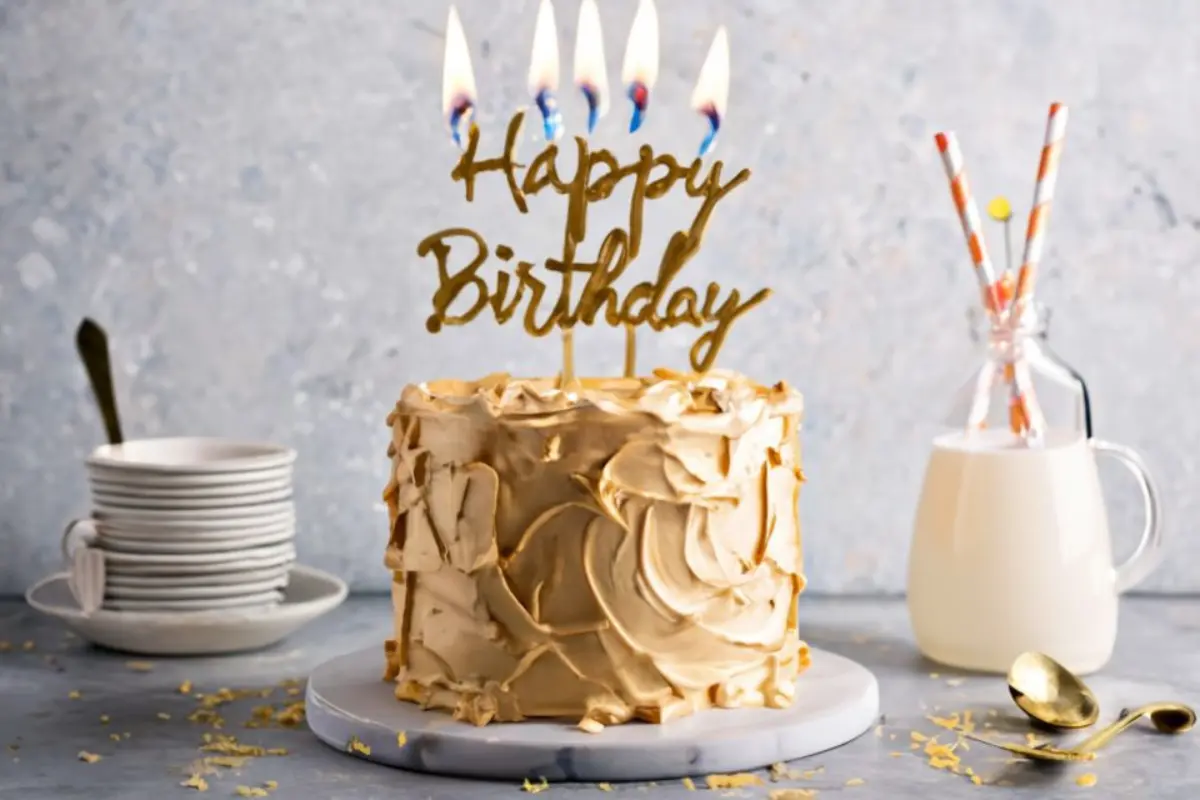
Crafting a Golden Birthday Cake: An Overview
Ah, the allure of gold! It’s not just a symbol of wealth and prosperity but also a color that brings a touch of elegance to The Food Timeline – Cake History Notes. And when it comes to birthday celebrations, a gold-themed cake isn’t just a dessert; it’s a statement piece that says, “This is a day to remember!” But why choose gold, you might wonder? Well, for starters, it’s a way to add a bit of luxury and uniqueness to your celebration. Plus, it’s surprisingly versatile, complementing both classic and modern party themes with equal grace. when discussing the allure and elegance of gold-themed cakes, you could link to Elegant Gold Birthday Cake.
Now, before we get our hands floury, let’s talk about the appeal of a gold-themed celebration. It’s not just about the visual impact; it’s about creating an atmosphere of warmth and festivity. A gold cake acts as the centerpiece, drawing everyone’s attention and making the birthday person feel truly special. And let’s be honest, who wouldn’t want their birthday cake to look as precious as the moments you’re celebrating?
So, as we embark on this golden journey together, remember that creating a golden birthday cake is more than just baking; it’s about crafting an experience that will be cherished for years to come. Whether you’re a seasoned baker or a first-timer, this guide will provide you with all the tips and tricks you need to make a cake that’s as beautiful to look at as it is to eat. So, tie on your apron, and let’s get started on creating a masterpiece that will be the highlight of your celebration!
In the next section, we’ll dive into the preparation phase, covering everything from gathering your ingredients to choosing the right tools for the job. Stay tuned, because this is where the magic begins to unfold!
Part 2: Ingredients for Your Gold-Layered Cake

Now, let’s roll up our sleeves and get into the nitty-gritty of how to make a gold birthday cake. First off, gathering your ingredients is crucial. You’ll need the basics: flour, sugar, eggs, and butter. But, for that golden touch, you’ll also want to stock up on edible gold leaf, gold dust, or gold spray—these are the secret weapons that will transform your cake from ordinary to extraordinary.
Moreover, let’s not forget about the flavor! Vanilla or chocolate? Or perhaps something more adventurous like lemon or red velvet? The choice is yours, but remember, the taste is as important as the appearance. After all, a cake that looks good but tastes bland is like a treasure chest filled with fool’s gold—disappointing, to say the least.
Additionally, for the must-have tools for a metallic cake, ensure you have a reliable mixer, cake pans, a cooling rack, and, importantly, a smooth icing spatula and fondant smoother. These tools are your allies in achieving that sleek, professional look.
Furthermore, consider investing in quality baking pans. They make all the difference in baking evenly cooked cakes, which are essential for a layered masterpiece. Also, a turntable might seem like a luxury, but it’s a game-changer for applying and smoothing your icing or fondant.
Lastly, patience is an ingredient too! Rushing the cooling or decorating process can lead to a cake that’s more fool’s gold than 24 karat. So, take your time, and enjoy the process. After all, creating a masterpiece is as much about the journey as it is about the destination.
In the next section, we’ll dive into the baking process itself. This is where your cake starts to take shape, and where your creativity begins to shine. Stay tuned for tips on achieving the perfect bake and that coveted gold hue.
Part 3: Baking Your Golden Birthday Masterpiece

Achieving the Perfect Gold Hue
Now, onto the heart of the matter: baking the cake itself. Firstly, preheat your oven—this step is crucial for an even bake. Next, mix your ingredients according to your chosen recipe, being mindful to incorporate them well for a smooth batter. Remember, the foundation of a great gold birthday cake is in its taste and texture, so don’t skimp on quality or effort here.
Moreover, once your batter is ready, pour it into your prepared pans. Here’s a pro tip: use a kitchen scale to divide the batter evenly. This ensures your layers are uniform, making your cake not only taste great but also look professionally made.
Additionally, as your cake bakes, let’s talk about achieving that golden hue. For those wondering how to make a gold birthday cake truly stand out, it’s all in the decoration. While your cake is cooling, mix a small amount of gold dust with alcohol (like vodka or lemon extract) to create a paint. This mixture can be brushed onto fondant or directly onto the cake for a shimmering effect.
Gold Decoration Techniques for a Luxurious Effect
Furthermore, applying edible gold leaf is another method to achieve that luxurious gold finish. It requires a gentle touch and patience, but the results are stunning. Place the gold leaf where you want it, then use a soft brush to smooth it out and ensure it adheres properly. While not a direct recipe, it provides visual inspiration for those interested in cake decoration. Gold Paint Splotched Cake – YouTube
Lastly, don’t forget about gold sprinkles or gold sugar pearls for added texture and sparkle. These can be pressed into the icing or sprinkled on top for a finishing touch that’s both beautiful and delicious.
In the next section, we’ll explore the final steps in decorating your cake, focusing on gold leaf application, edible gold spray, and dust, and how to add those final touches that will make your cake the centerpiece of any birthday celebration. Stay tuned for more tips on bringing your golden birthday cake to life!
Part 4: Decoration and Finishing Touches

Applying Edible Gold Leaf for Elegance
After your cake has cooled and you’ve applied a smooth layer of icing or fondant, it’s time to bring the golden theme to life. Applying edible gold leaf is a delicate process, but it’s absolutely worth it for the stunning effect it creates. Firstly, ensure your hands are clean and dry to avoid tearing the fragile sheets. Gently lay the gold leaf on the desired area of your cake, using a dry brush to smooth it out. This technique adds an unparalleled level of sophistication and luxury to your creation.
Moreover, for those wondering precisely how to make a gold birthday cake sparkle, combining gold leaf with strategic lighting can make your cake truly shine. Place your cake where it can catch the light, and watch as the gold leaf illuminates, making your masterpiece the star of the show.
Using Edible Gold Spray and Dust for Shimmer
Additionally, edible gold spray and dust offer a more uniform gold finish and are perfect for covering larger areas or adding highlights. When using gold spray, hold the can at a distance to ensure even coverage, and use short bursts to avoid pooling. For gold dust, use a soft brush to apply it gently over the cake or on decorations like fondant flowers or letters. This method is fantastic for adding depth and dimension to your cake’s gold accents. For those looking to add a luxurious finish to their cakes, similar to the opulence of a Chocolate Overload Cake Guide.
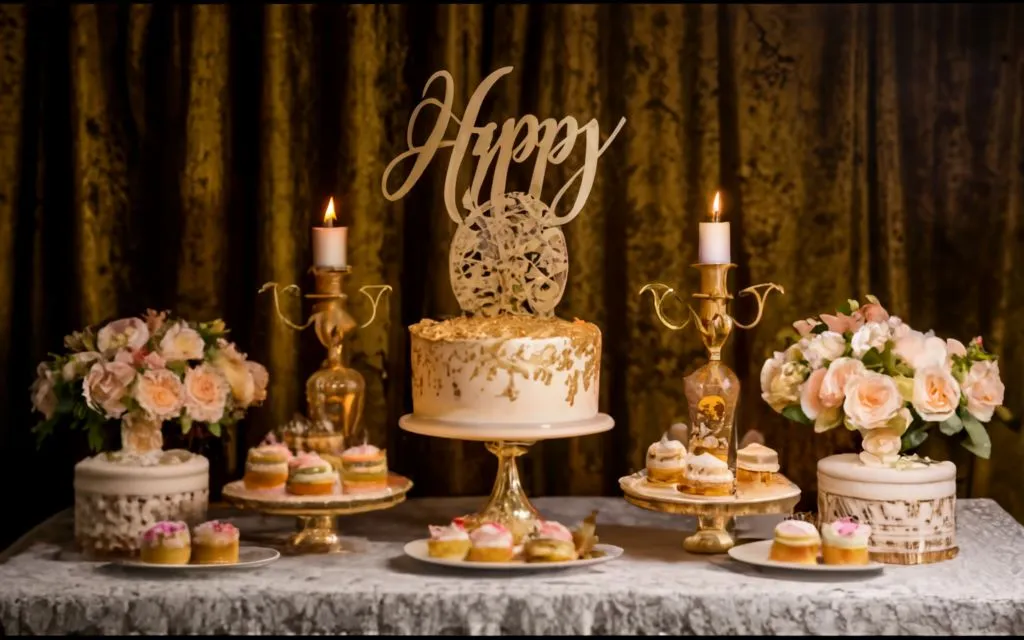
Luxurious Presentation Tips
Lastly, presentation is key. Place your gold birthday cake on a pedestal cake stand to elevate it both literally and figuratively. Surround it with candles or flowers for an extra touch of elegance. Remember, the goal is to create a visually stunning centerpiece that tastes as good as it looks.
In the next section, we’ll share expert tips for ensuring your gold cake not only looks luxurious but also retains its brilliance, making your baking endeavor a resounding success. Stay tuned for these final pearls of wisdom that will help your gold birthday cake leave a lasting impression.
Part 5: Professional Tips for a Stunning Gold-Themed Cake
Expert Tips for a Stunning Gold Cake
Creating a gold birthday cake that wows your guests involves more than just following a recipe. It’s about mastering a few key techniques and embracing creativity. Firstly, when aiming for that perfect gold finish, remember that less is often more. Start with a light hand when applying gold dust or leaf, as you can always add more to achieve the desired effect.
Moreover, consistency in your icing or fondant is crucial. For a smooth application, ensure your base layer is free of lumps and bumps. This will make applying gold decorations much easier and more effective. For more inspiration on decorating your cake and making it the centerpiece of your celebration, check out our Ultimate Grinch Cake Guide: Recipes, Decorating Tips & Ideas
Additionally, when considering how to make a gold birthday cake, think about the shades of gold. Mixing different tones can add depth and interest to your cake. For instance, combining lighter golds with deeper hues can create a visually appealing contrast.
Preserving the Cake’s Gold Sheen
Lastly, to keep your cake looking its best, store it in a cool, dry place until it’s time to serve. Humidity can dull the gold’s shine, so it’s best to avoid refrigerating your cake unless absolutely necessary. If you must chill it, consider covering it lightly with a dome or cake keeper to protect the gold elements.
In conclusion, creating a gold birthday cake is an art form that combines baking skills with a flair for decoration. By following these tips, you’ll be well on your way to crafting a cake that’s as memorable as the occasion it celebrates. Remember, the key to a successful gold cake lies in patience, precision, and a bit of creativity. So, go ahead, let your imagination run wild, and create a golden masterpiece that will be the talk of the party!
In the next and final section, we’ll address some frequently asked questions that might arise as you embark on your gold cake-making journey. Stay tuned for helpful insights that will ensure your baking experience is as smooth as gold.
Part 6: Answering Your Gold Cake Questions
Creating a gold birthday cake is a delightful challenge that combines baking skills with artistic flair. As we wrap up this guide, let’s address some frequently asked questions to help you on your journey.
Enhancing the Gold Color: How To?
Firstly, achieving a vibrant gold color often requires layering. Begin with a yellow or golden base before applying edible gold leaf or dust. This technique ensures that any gaps in the gold leaf still reflect a gold hue, enhancing the overall effect.
Is Real Gold an Option for Cake Decorating?
Indeed, edible gold leaf is real gold that’s been hammered into thin sheets. It’s safe to consume but use it sparingly as a decorative element. It’s a luxurious touch that makes your cake stand out.
Preparing Your Gold Cake in Advance: Tips?
Certainly, you can bake the cake layers ahead of time. Once cooled, wrap them tightly and freeze. However, apply the gold decoration closer to the event to maintain its luster. Thaw your layers before decorating for the best results.
Quick Solutions for Busy Bakers
For those short on time, consider gold accents like pre-made gold sugar pearls or edible gold spray. These can quickly add a touch of glamour without the need for intricate decoration.
Serving Your Gold Birthday Cake: Best Practices?
Finally, serve your cake at room temperature for the best flavor and texture. Use a clean, sharp knife dipped in hot water for clean slices, showcasing your beautiful creation inside and out.
In conclusion, learning how to make a gold birthday cake is an adventure filled with opportunities for creativity and elegance. With these tips and techniques, you’re well-equipped to create a stunning centerpiece for your next celebration. Remember, the key to a beautiful gold cake lies in patience, attention to detail, and a dash of creativity. Happy baking, and may your cakes always sparkle with gold!